Table of Contents
I printed a beautiful photo of my daughter at sunset on a huge canvas last year but I wasn’t satisfied with the resolution. Since then I have been studying and experimenting with shooting (gigapixel) panorama photos. No, not a panorama that’s made by turning your camera or phone but shooting dozens/hundreds of single photos and stitching them together in Adobe software.
I didn’t find much clear information on the internet so I just started shooting. I have figured most things out by trial and error and came up with a workflow that works best for me. In this tutorial I assume you have read my basic editing tutorial already. I’ll show you my systematic tutorial guide which should have you shoot (gigapixel) panorama’s in no time!
The WHY and requirements for (gigapixel) panoramas
There are several reasons why you would want to shoot a (gigapixel) panorama photo, or just a panorama photo consisting of several photos. My free workflow guide works also for smaller panoramas of course which I do a lot too. I have two reasons to shoot a panorama photo.
Stitching a few photos instead of using an (ultra) wide angle lens
Most panorama’s I shoot are photos I could have taken with an (ultra) wide-angle lens too, but don’t throw away your wide-angle lens yet! Always take a shot with an (ultra) wide angle lens too so that you have a backup in case the panorama doesn’t work out.
The reason I prefer to shoot landscapes, cityscapes and much more using multiple photos is that I have more control over the image. Wide angle lenses often have distortion especially in the corners, plus the whole image gets distorted with curved lines. If you correct this on a wide-angle photo than you don’t have enough pixels as you will lose quality. Using many photos will give you much more pixels to work with in the first place.
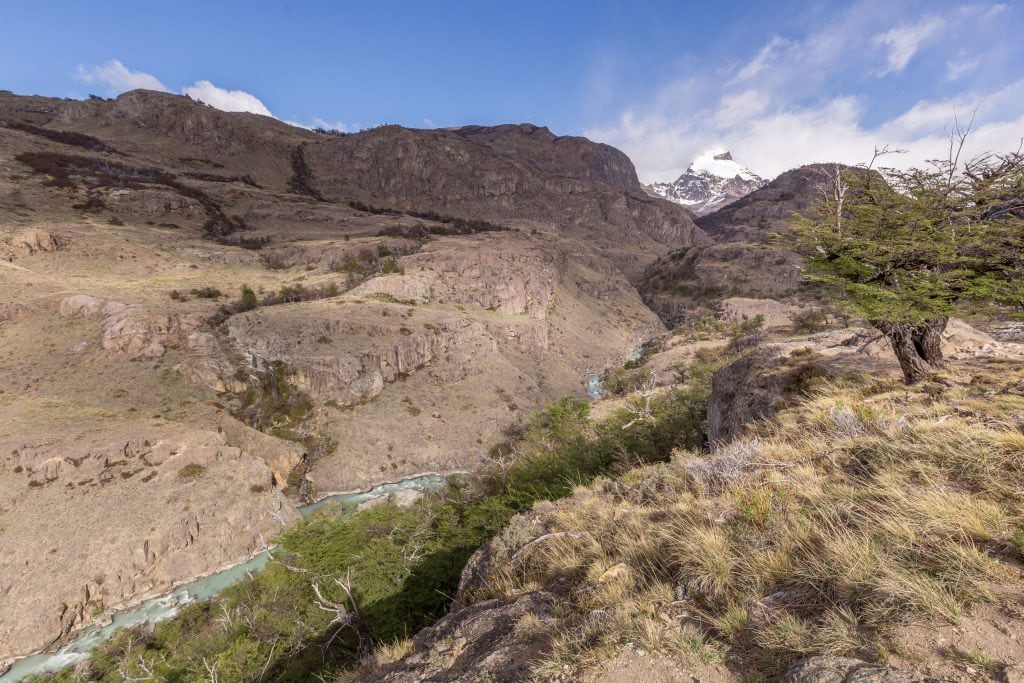
This photo consists of 80 single shots. I have played around with perspective correction which is not possible with a single wide-angle shot as you would not have enough pixels to play with.
Ultra-high (gigapixel) resolution photos
Gigapixel panorama photos I don’t shoot all the time. I only do this when the scenery is VERY special and that I can imagine someone would want to print this at a high resolution OR use it in digital format and needs to zoom in. When I shoot gigapixel photo’s I’ll shoot at least 200 photos or more as with less photo’s you don’t get to the 1024MP or 1GP size.
My camera shoots 20MP pixel photos times 200 comes to 4GP in size BUT you’ll lose on the overlap and some cropping. 200 photos normally results in a 1GP photo. It then totally depends on what my subject is as sometimes it doesn’t make sense to go higher, but in certain cases it does. Shooting a city from a high viewpoint is one great example of shooting 1000+ photos, but keep in mind that you’ll need a good zoom lens too.
PRO TIP: Always take a shot with an (ultra) wide angle lens too so that you have a backup in case the panorama doesn’t work out.
Requirements for a (gigapixel) panorama photo
You don’t need much! I do suggest shooting all photos in RAW format but who doesn’t do that these days? I prefer a full frame DSRL (check out my camera gear) but any camera will do if you are able to use manual modes. For editing a fast computer is the best as it takes time; lots of time. Further Adobe Photoshop requires a large scratch disk preferable of 1TB. I’m using an external 1TB SSD USB3 hard disk which is only used as a temporarily scratch disk and it will go full when stitching a gigapixel photo. See also some remarks below in the troubleshooting section what happens if you don’t have one. A tripod comes in handy (mainly if you go higher as 100-120mm zoom) but isn’t always needed. If you have all items you’re ready to go!
Shooting the photos and pre-work
Shooting a (gigapixel) panorama photo is best done from a tripod BUT I shoot most panoramas which are up to 80-120 photos by hand. I’m too lazy to use a tripod and the software is advanced enough to stitch it correctly. If you go into gigapixel photography than a tripod is required as you’ll otherwise lose control. There are also automatic tripod heads which will turn your camera automatic; I don’t have one (yet). Shoot from top left to bottom right and make sure each photo overlaps for about 30% so that the software can stitch is correctly.
Make sure to shoot in manual mode including the focus. The best way to get the settings is to select in automatic mode the point that you need to be in focus; then put the camera into manual focus mode. Select both shutter speed and aperture that the camera said was good while in automatic mode. If you shoot by hand you must use your head as a “tripod” as all photos must be made from the same viewpoint; don’t move except turning your head. So, look through the camera while shooting; if you hold the camera (with screen) in front of you you already turn to much.

Now, let’s do the pre-work needed before we can stitch the photos together. I assume that you have read my ultimate free workflow guide for basic photo editing using Adobe software already. If not; then do that first. In Adobe Bridge (or Lightroom, but if you read my other post you’ll know I don’t use it) select one of the photos that you’ll use in the panorama that represents an average. On that photo do the basic photo editing, but ONLY the following: set the highlights/shadows, correct the whites/blacks, do the sharpening, set the white balance, and do the lens corrections. Now select all photos (see screenshot above) and develop all other photos the same why by applying the same conversions. Now all photos should be the same and ready for stitching.
Stitching the photos of a (gigapixel) panorama
Now Adobe Camera Raw can in the most recent versions stitch photos together directly and output a RAW-file. This RAW file contains more information, but, in my experience, this does work perfectly only if you have just a few photos to stitch. I have experienced a lot of errors in stitching this way and if the resolution goes beyond 512MP than Adobe Camera Raw won’t be able to handle the file anyway. So, we’ll use Adobe Photomerge! Select all the photos and click on Tools > Photoshop > Photomerge in Adobe Bridge (it works also out of Adobe Lightroom). You’ll now get a popup in Adobe Photoshop as you can see in the following screenshot.
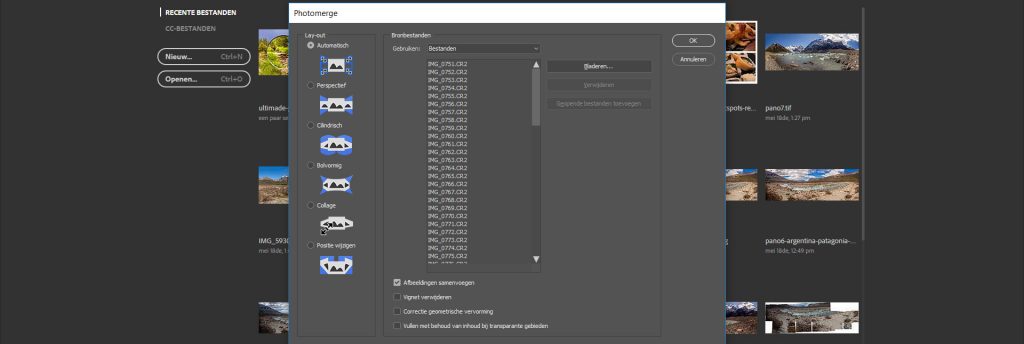
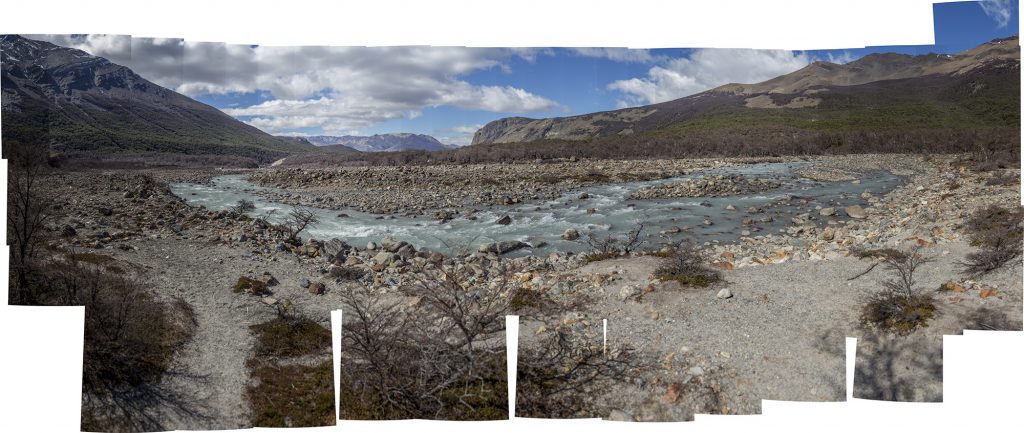
I normally leave everything set to automatic and as the lens corrections are already done in Adobe Camera Raw this is also not needed. Just hit OK and Photomerge will start to work; this takes time! Once finished you’ll get a result as you can see in the following screenshot which is “missing” parts and you might see hairlines. When satisfied with the result then flatten the image and the hairlines will disappear. We’ll get to the missing parts and distortion now.

Now I must admit that in this particular panorama I didn’t make enough photos on the left and right bottom. That’s also the reason I use it in this tutorial to show the errors that can happen; do shoot more photos towards all directions as you think you need. It’s missing quite a lot but I’ll show you a trick how you can get this back, especially in such landscapes where it’s sky and the missing parts are on the foreground and out of focus. After the image is flat crop it just a bit (see screenshot below) and select all the white parts with the magic wand tool. Now increase the selection (Select > Edit > Increase) by about 25 pixels so that you have not only the white but also the edge selected.

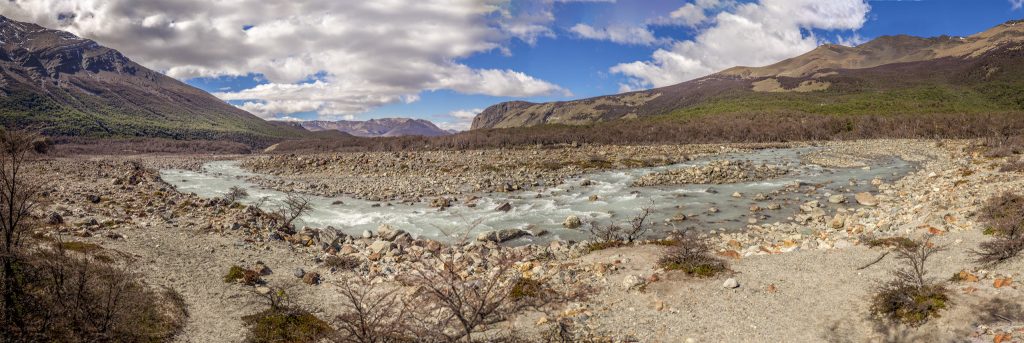
Let’s do some magic! Go to Edit > Fill (Shift+F5)> select Content Aware and hit OK. You’ll now see that Adobe Photoshop is very powerful. It will automatically re-create the missing areas which it does very well especially in such images where it’s mainly rock, trees and sky. Quite random parts so this doesn’t work perfect in cityscapes as it’s much less random. If you get an error or photoshop crashes then don’t select everything at once. In this photo, the missing parts were quite huge and the fill didn’t go well and I had to use the clone tool to adjust it further. Normally missing parts shouldn’t be more than a tenth of what’s missing in this photo. I’m not going into details of cloning and retouching photos in this article; if there is interest please write a comment and I consider it for a next article.

There is one major step left in Adobe Photoshop for any (gigapixel) panorama photo: Adaptive Wide Angle Filter. This filter lets you straighten curved lines which you will get in a wide-angle lens but also panorama photos will be curved. This filter is also one reason I prefer to shoot panoramas rather than using a wide-angle lens. If you straighten the lines the software will stretch parts or shrink parts.
I prefer to start with a 100MP photo using the panorama technique to end up with a 20MP photo with straight lines. During the whole process I lose data but for normal use I’ll end up with a perfect straigh 20MP photo. If you start with a 20MP you’ll directly lose data or the filter needs to calculate more. In this photo when I open the filter it bends the photo more as you can see in the following screenshot. In the second screenshot, you can see the lines on the left and right (vertical) and the horizontal lines to make it straight. For this photo, this is enough so I saved the file (TIFF uncompressed) after I cropped it a bit. In case the filter gives you again missing parts you could again use the content aware filling. Now it’s time for finetuning.


Finetuning and result
Now open the photo in Adobe Camera Raw again to do again all that I have written about in my basic photo editing tutorial again. The only difference I suggest is to only set the highlights to -50 and the shadows to 50+ (approximate) and the sharpening depending on the result. Everything else is the same and now is the time to also finetune certain areas.
Remember that in the basic edit of the single shots when I started stitching I only did a rough development. Now I finetune and the result you can see in the following screenshot and look at the details! I could have finetuned this photo much more but that goes beyond the scope of this (gigapixel) panorama tutorial. If you can’t open the panorama photo in Adobe Camera Raw then you’ll run into a limitation which happens with gigapixel panoramas; read my troubleshooting below.

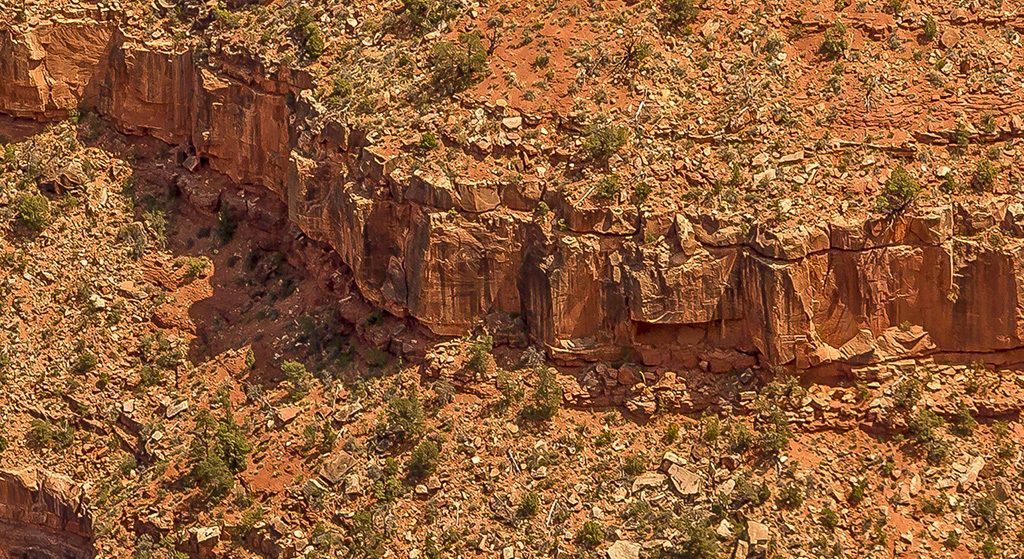
I hope this tutorial is of help for you and I hope that you’ll also get the (gigapixel) panorama shooting bug. A whole new world will open and you’ll soon forget about that wide-angle lens! I use this technique mainly for landscapes which are very unique and that I think people would want to print in high resolution. Sometimes you’ll even see things on the photo you didn’t see when shooting like the people in the photo in the header of this article. Isn’t that cool? I wish you happy gigapixel panorama shooting! If you have questions or suggestions to my workflow please comment so that I can learn from you too.
Stay tuned for more stories and subscribe to the newsletter or follow CTB on social media (Facebook, Twitter, Instagram including Instagram stories; on all social media you can find CTB @christravelblog) to get updated information.
Troubleshooting for (gigapixel) panorama shooting
File type limitations
Different file types have different limitations. The best file type to save a panorama is in uncompressed TIFF which is also the fastest way. TIFF files only allows files up to 4GB in size and panorama’s go over that easily. If you’re over 4GB in size then use Adobe Photoshop to save a PSB file which is a file type that should not run into limitations. Another way is if you’re just over 4GB is to use ZIP compression but saving will go much slower in that case.
Adobe Camera Raw limitations
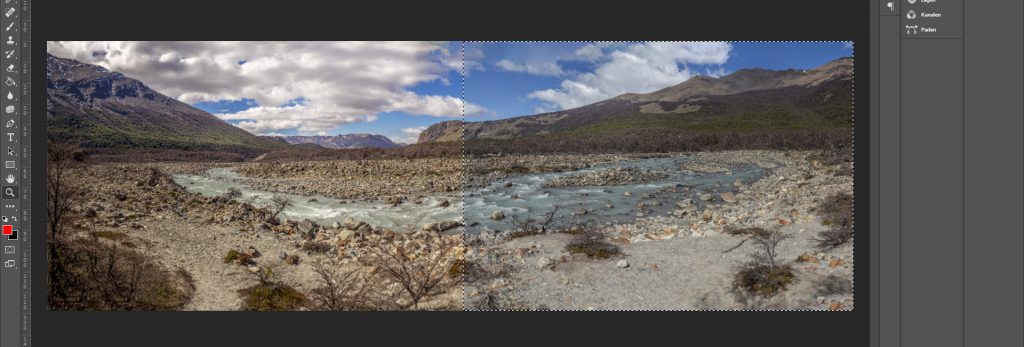
Adobe Camera Raw can ONLY handle 512MP photos OR 512MP at a time. The latter is how you must approach a photo for finetuning: take 512MP (or less) at a time! First finetune an “average” part of the photo which changes should be applied to every part of the photo. Select a part of the photo, open the Camera Raw filter, do what you must do and after that select a 2nd part and apply the same. Repeat until you have done the full photo. See a sample in the following screenshot. This is also the reason you won’t be able to stitch photos directly in Camera Raw as you’ll get an error there are to many pixels.
Stitching problems
Stitching problems can happen due to several reasons. If you shoot by hand than the angle of shooting can change just enough so that the stitching doesn’t go well. This happens especially if you have a lot of straight lines from architecture in the photo. In such shootings: use a tripod! It also happens more often if you try to stitch a few photos which are taken by a wide-angle lens but normally this goes well. Stitching doesn’t work if you have shot at automatic settings; you’ll be in trouble. Light should be constant too because if you shoot at dawn for example for a one hour and the light changes you’ll notice this in your photos. In such case, you’ll have to do a lot of after work; it’s not impossible. If there are moving objects like people in the photo you might end up with half bodies; shoot photos when there are no (half) moving objects in the photo.
Blending problems in Photoshop photomerge
If you end up with photos that aren’t blended correctly (see the lines in the screenshot below) then get a bigger scratch disk. I pulled my hairs on this one as parts of a photo went well (2nd screenshot). After trial and error I found out my hard disk was running full and I thought about the scratch disk. This was the problem indeed. I use now a 1TB external USB3 SSD hard disk with a speed of 400mb/s which is perfect. If you go over 100 photo’s you’ll very quickly run into this memory / scratch disk problem. Make sure you have enough space for the job as Adobe Photoshop needs to write a lot of temporary data.
