Table of Contents
- Night photography tutorial & tips
- Night photography Washington DC
- Night photography Washington DC: Lincoln & Washington Memorials and the Capitol on one line
- Night photography Washington DC: Lincoln monument
- Night photography Washington DC: Korean war & WWII monument
- Night photography Washington DC: Washington memorial
- Night photography Washington DC: Jefferson memorial
- Night photography New York City
- Night photography New York City: Times Square
- Further reading
- Gallery night photography New York City & Washington DC
Night photography is something I like to do occasionally especially if it’s an awesome place. It simply takes time and especially in the evening I also want to check out nightlife and sample craft beer. In both New York City and Washington DC I went out two evenings to take night photos when I was doing a 2 week USA city trip tour. It was well worth it and I’ll show you the best night photography spots in Washington DC and New York City so you don’t lose precious time searching for them. First, I’ll share some basics to keep in mind if shooting photos in the dark. Read them carefully and also check out my basic photo editing guide because shooting is one thing, editing is as much work after.
Night photography tutorial & tips
Let me start by saying that if you think you can shoot by hand at night you’re wrong and don’t know anything about night photography. If you shoot by hand you’ll get an ISO 12500 or more, F2.8-F5.6 pending your camera, and probably a shutter speed of 1/5. This will result in a photo that might look all right on the back of your camera but won’t be sharp and won’t be of quality as you can see in the following sample.

You need a tripod! The following setup will do if you plan to go out in the night for night photography.
- Use a tripod heavy enough to keep the camera and lens steady. Some photos in this article I shot with a 300mm lens and these are heavy so a good tripod is necessary.
- Make sure to have a remote control to release the shutter. If you would press the shutter release, it will vibrate the camera and the photo will be blurry.
- Set your ISO to 100 as this will give the crispest most smooth no noise photo. High ISO images make the sensor work harder to get more light in but results in random noise which you don’t want. There are artistic exceptions of course.
- Make sure to disable any stabilization your camera has. Enabling this might do the opposite on a tripod.
- Set your camera to Av mode and select F22 (or even F32 if the lens can do that) which will give the most depth of field. In most cases, there are exceptions, I want the full frame to be in focus. Especially at night when I shoot architecture or cityscapes. The camera will calculate the shutter speed which will be seconds long. There are of course photo’s where you want to have the background out of focus, in such cases select an F6-F8 for example. In this article all photos I wanted to have everything in focus.
- Now it happens often that the shutter speed exceeds 30 seconds which is normally the longest exposure on a DSRL. In that case put the camera into B mode (on ISO 100, F22) and use a timer to track the shutter speed. You can play around a bit taking various photos at various exposures too and even combine them later.
- In case there are a lot of people you want to remove, or if there is water you want to get silkier you can put a ND filter on the lens to make the exposure even longer. I recommend this only if the exposure is “only” up to 5-10 seconds. I would not per se extend 40 seconds to 2-3 minutes; at least not for the photos in this article.
Now let’s guide you through the best spots for night photography in Washington DC and New York City. Each photo is taken at F22 and ISO100 on a tripod and a shutter speed which varies per photo. I won’t repeat these settings for each photo.
USA – Best city trip itinerary for 2 weeks: New York, Washington DC, Denver & Las Vegas
Night photography Washington DC
Earlier on the day I did a photography tour with Washington Photo Safari which is run by David Luria. He’s awesome and besides explaining the basics of your camera he knows the history! My tour was during the day but tours at night are offered too. If you want to learn night photography from a pro or don’t want to go alone contact David. You won’t regret even if you’re already a pro. Let me take you to the best spots for night photography in Washington DC with special thanks to David pointing me to some of these spots.
Night photography Washington DC: Lincoln & Washington Memorials and the Capitol on one line
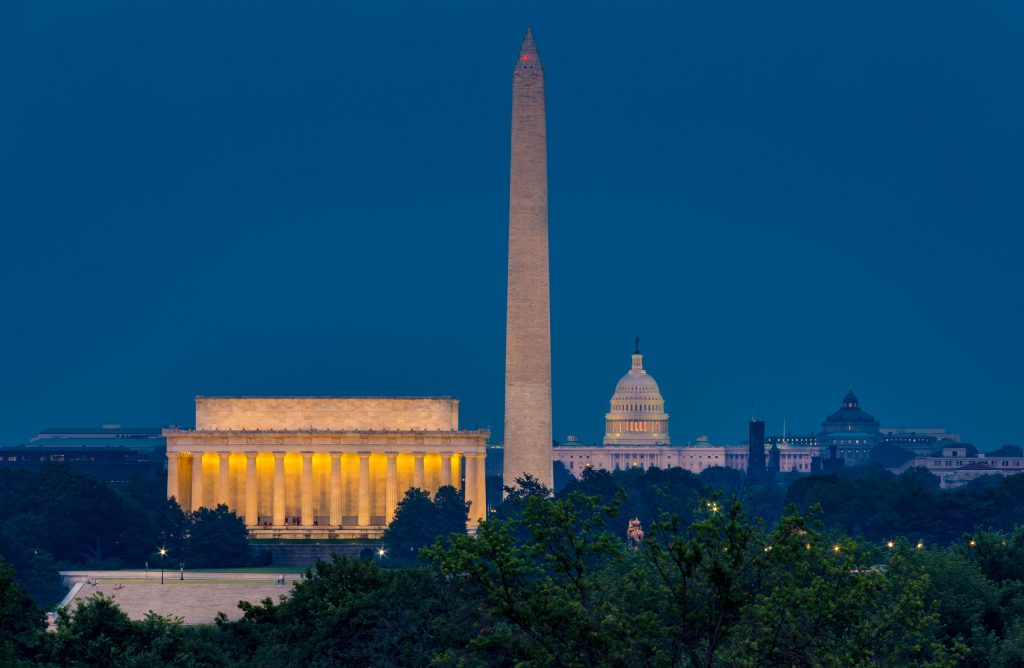
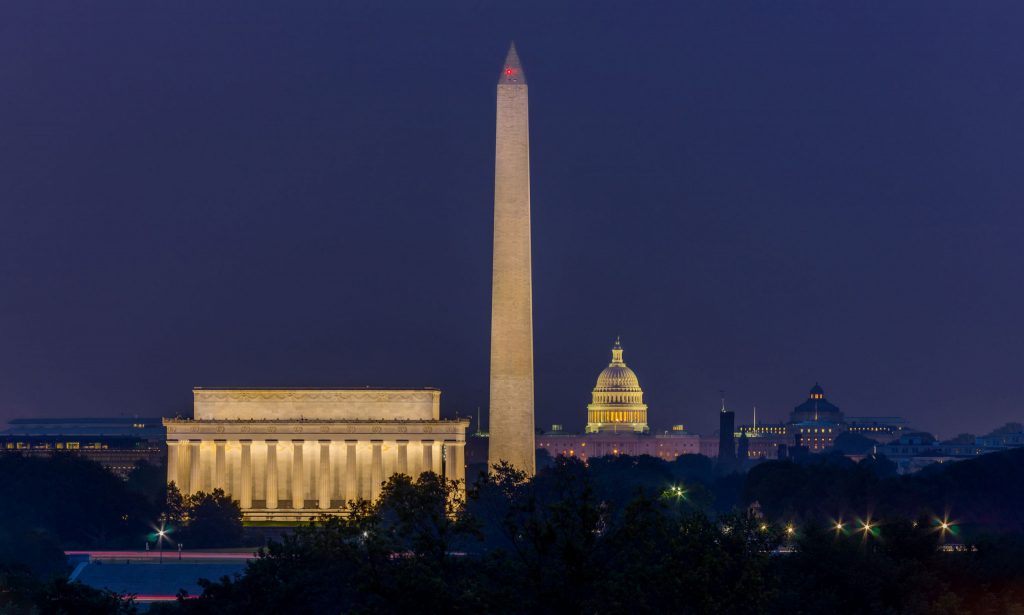
This shot was one of the most difficult ones to shoot as I had to use a 300mm lens. The focal length in combination with exposures of up to 50-70 seconds at F22/ISO100 made the risk of lens vibrations high. This would result in blurry photo’s. I needed the 300mm because this shot was taken from the Dutch Carillion next to Arlington cemetery where you can see the 3 monuments on one line. The F22 is needed as the three monuments have about a 2-mile distance between them and I wanted each of them in focus. The result is the following iconic night photo of Washington.
Night photography Washington DC: Lincoln monument
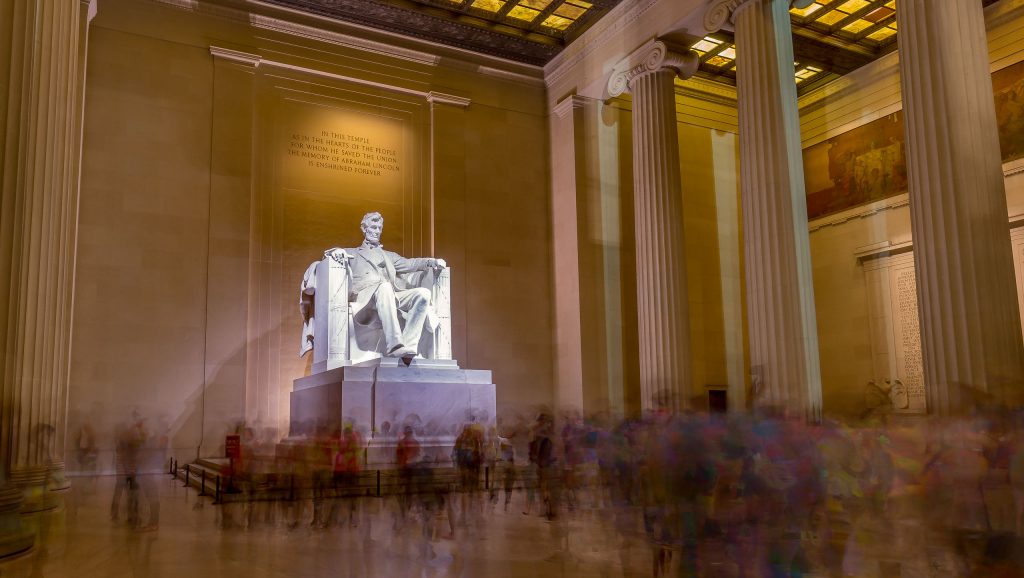
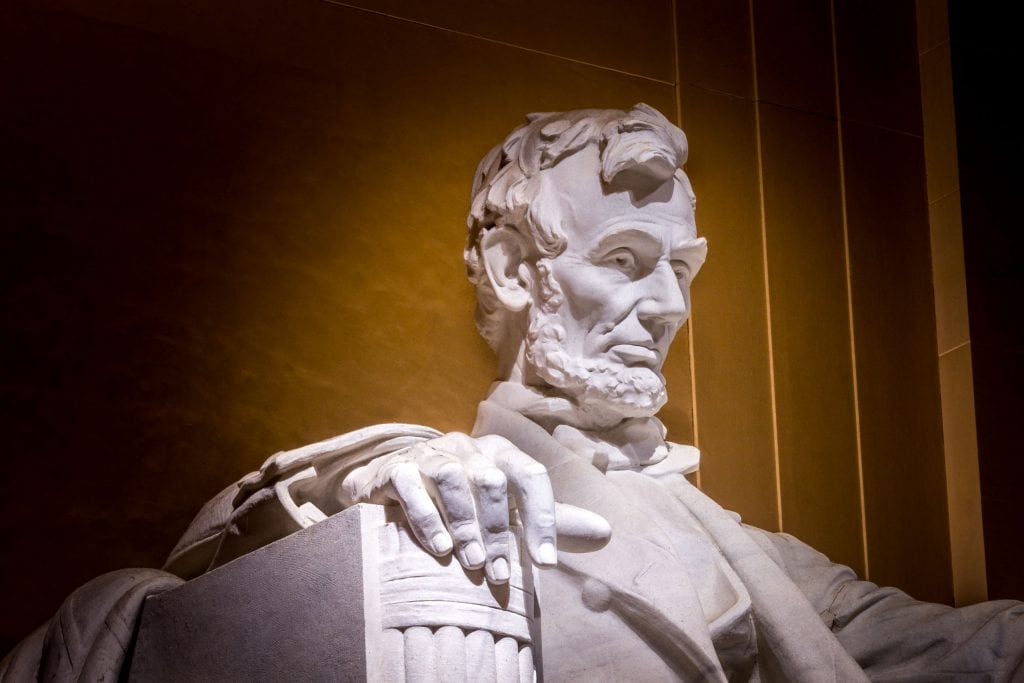
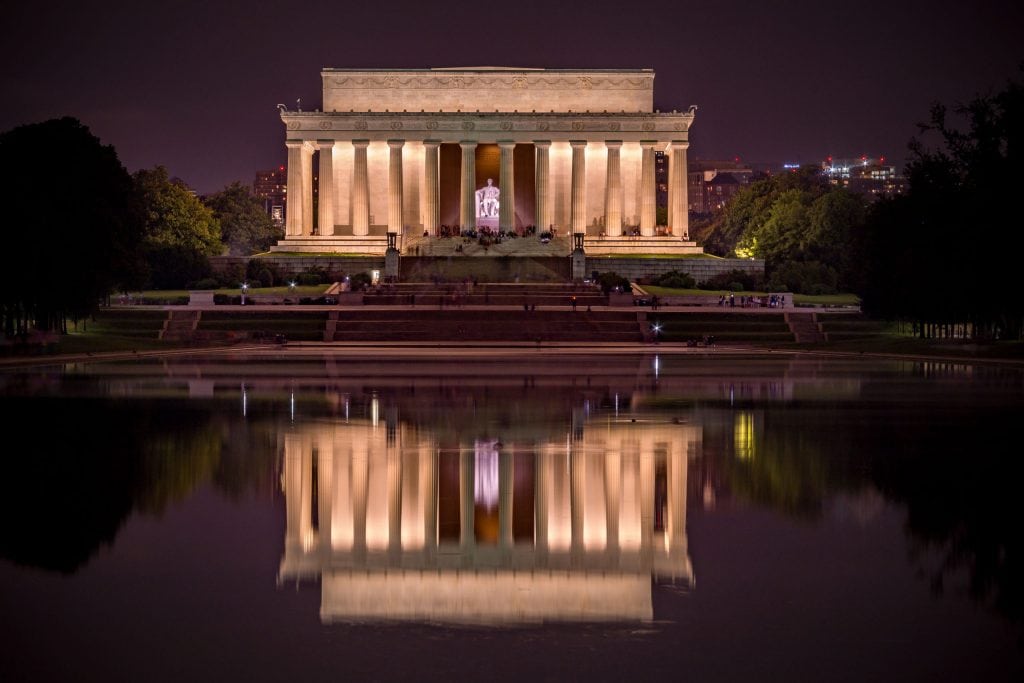
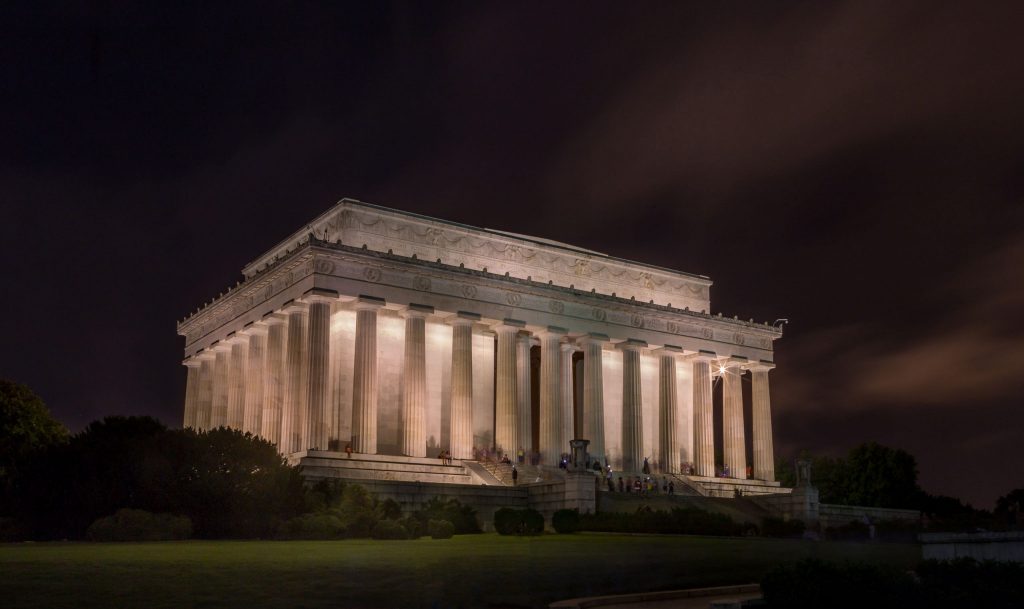
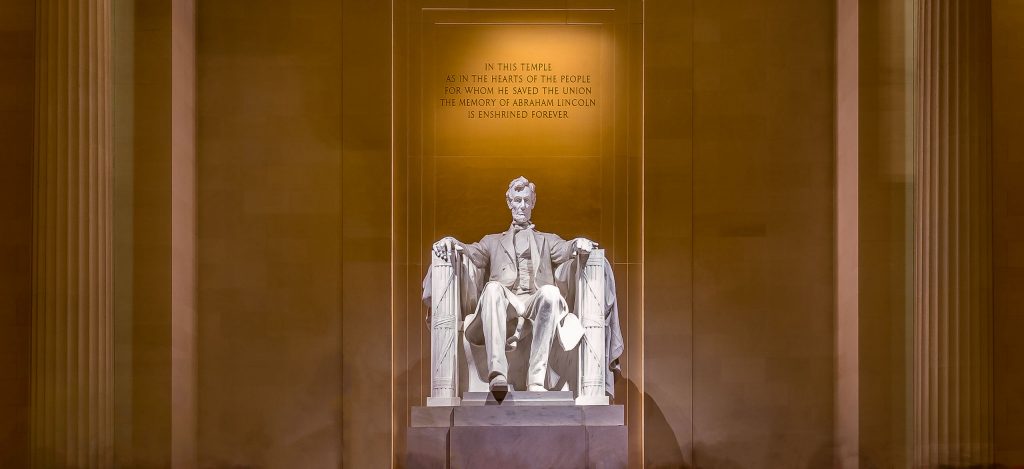
There are several places to photograph the Lincoln Monument (all photos are in the gallery). When you stand in front of the memorial you can make a full front photo which isn’t a nice composition. Walk a bit to the left so that you have two sides on the photo. Then, go inside to photograph Lincoln. Tripods aren’t allowed but just use them and big chance nobody will say anything. Be sure to make some closeups of the hands and face for which you need a tele lens. If there aren’t that many people you can shoot several photos from the same position to remove the people later (check my photography tuturials) by layering the photo’s in Photoshop.
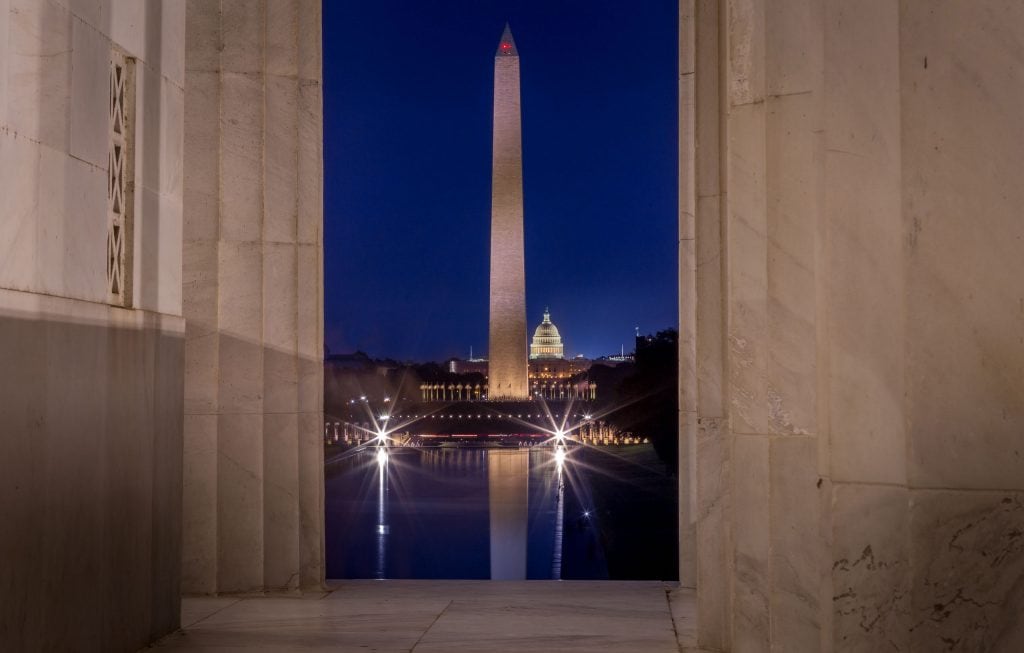
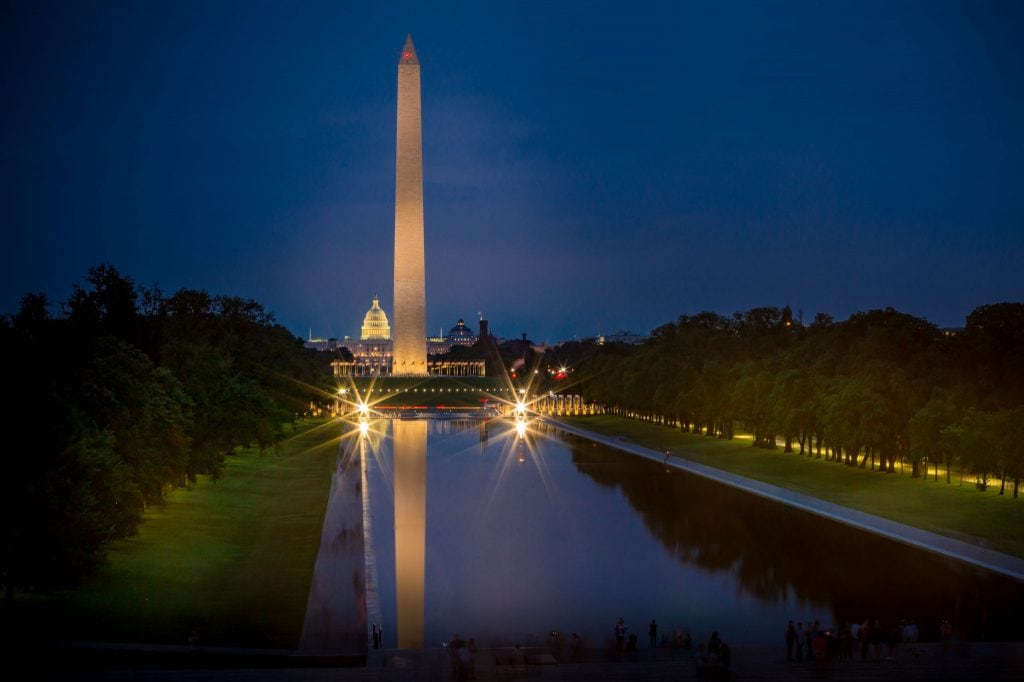
Walk around the Lincoln memorial to photograph through the pillars with the Washington monument in the back. As the exposures are long, about 30-40 seconds, don’t worry about walking people as you won’t see them anymore. An interesting composition is if someone is standing or setting on the ridge towards the Washington monument. Just make sure your model sits still for the length of the exposure. Last, make a shot towards the Washington memorial from the left patio as you don’t want a full straight photo with the reflection in the middle.
Night photography Washington DC: Korean war & WWII monument
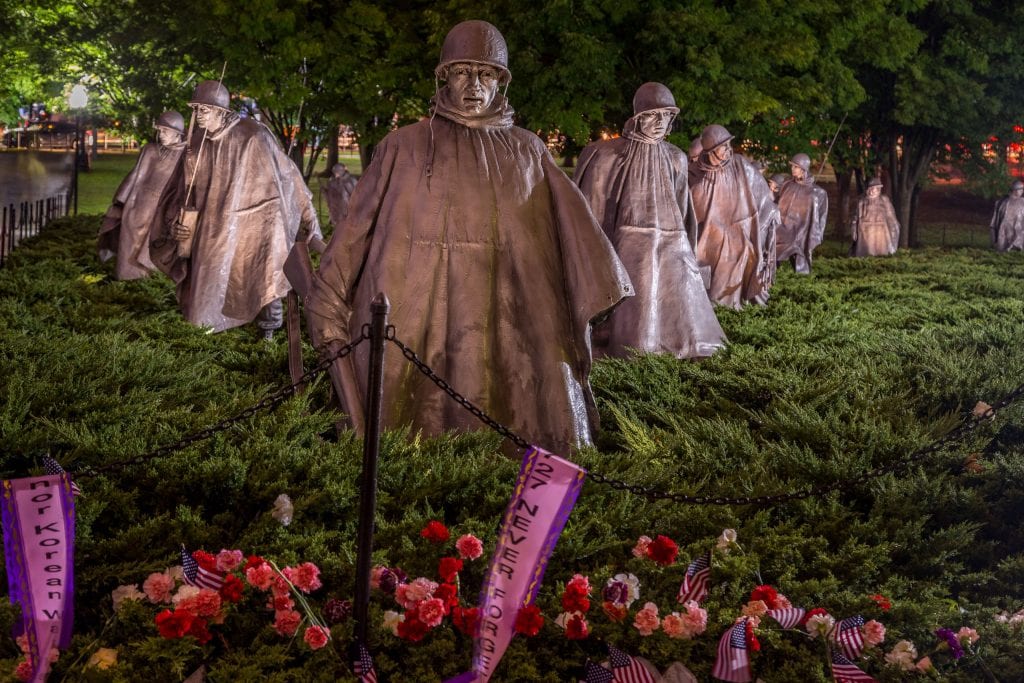
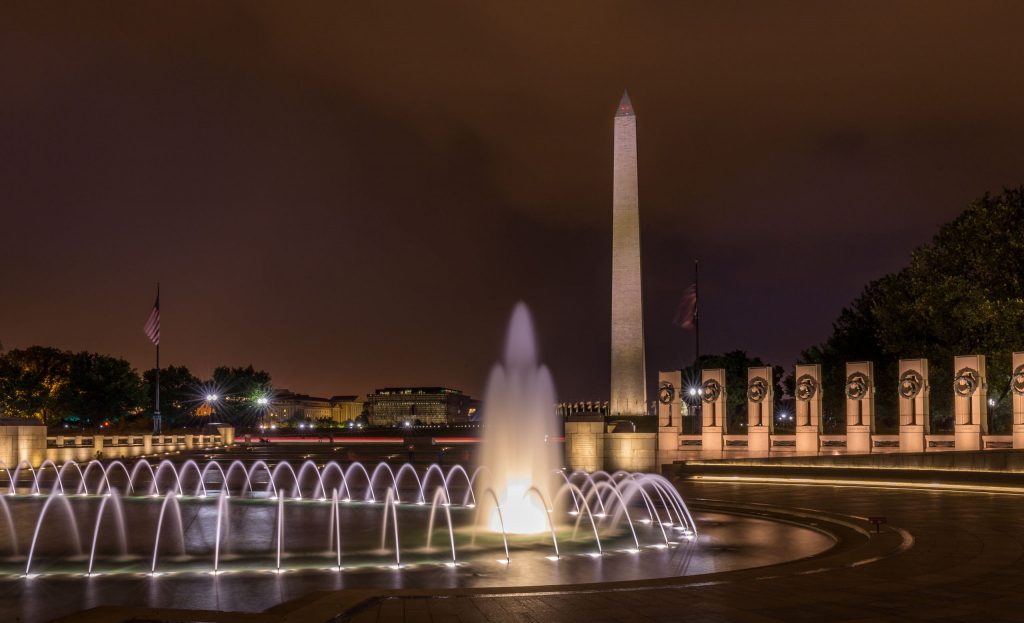
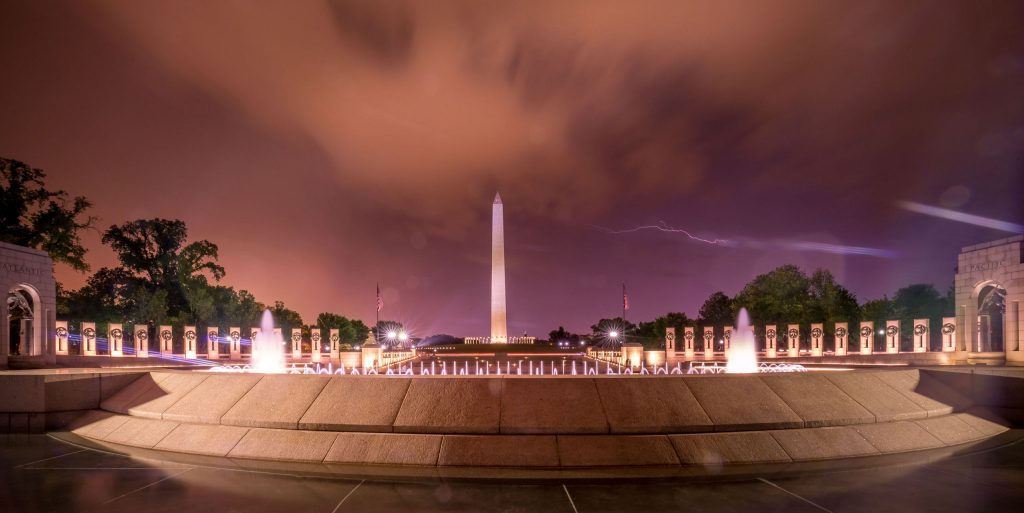
Walk from the Lincoln monument to the Korean war monument. The Korean war monuments soldiers are lid up at night this is a perfect moment to photograph them. It’s like if they are in the dense jungle of Korea. I shot several photos and continued to the WWII monument. At the WWII monument, I shot one more photo of the Lincoln memorial in a straight line at 300mm. Shooting at this focal length and angle gives a straight up view of the memorial which is all right during nighttime as you can see Lincoln inside the memorial. Then, look the other way and experiment with the fountains of the WWII memorial and the Washington Memorial in the back. It was raining and I was lucky to catch some lightning in the photo. Now, continue to the Washington Memorial.
USA – Best city trip itinerary for 2 weeks: New York, Washington DC, Denver & Las Vegas
Night photography Washington DC: Washington memorial
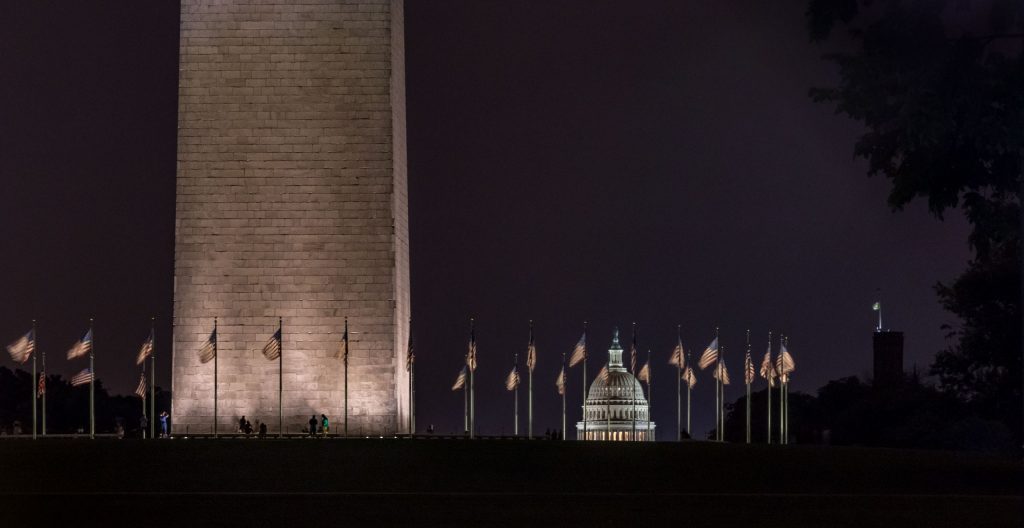
Walk along the right side of the WWII memorial across the street and setup your tripod there, it’s the best spot to photograph the Washington memorial. You’ll get the flags, Washington memorial and the Capitol in one picture. In my opinion, this is a better composition as having the full Washington monument in the photo. In that case there is too much emptiness. Now walk to the next spot to photograph the Jefferson memorial. If you’re tired skip this one as it’s a bit of a walk.
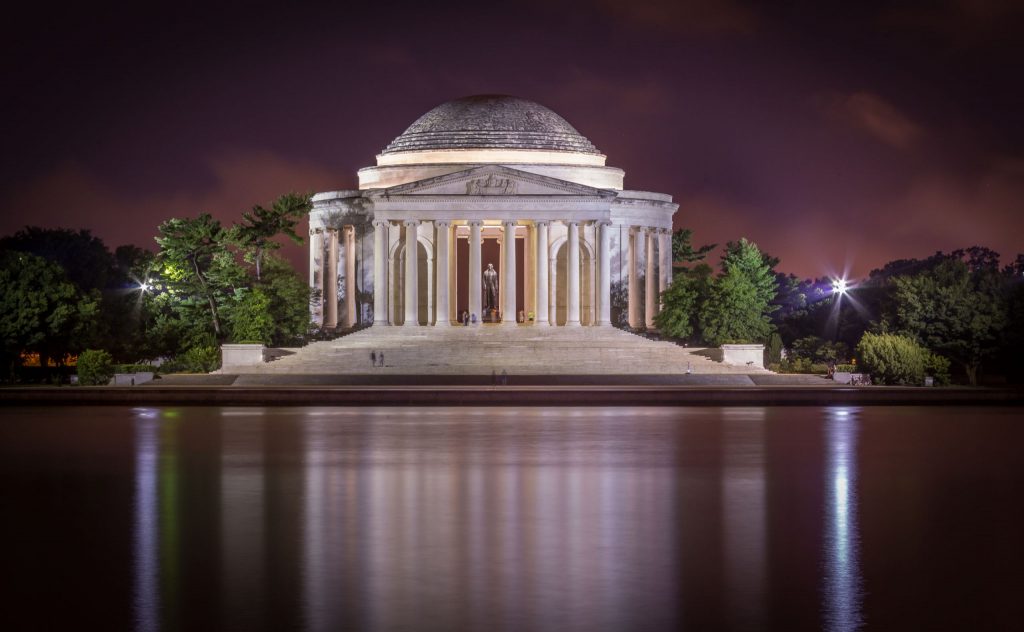
Night photography Washington DC: Jefferson memorial
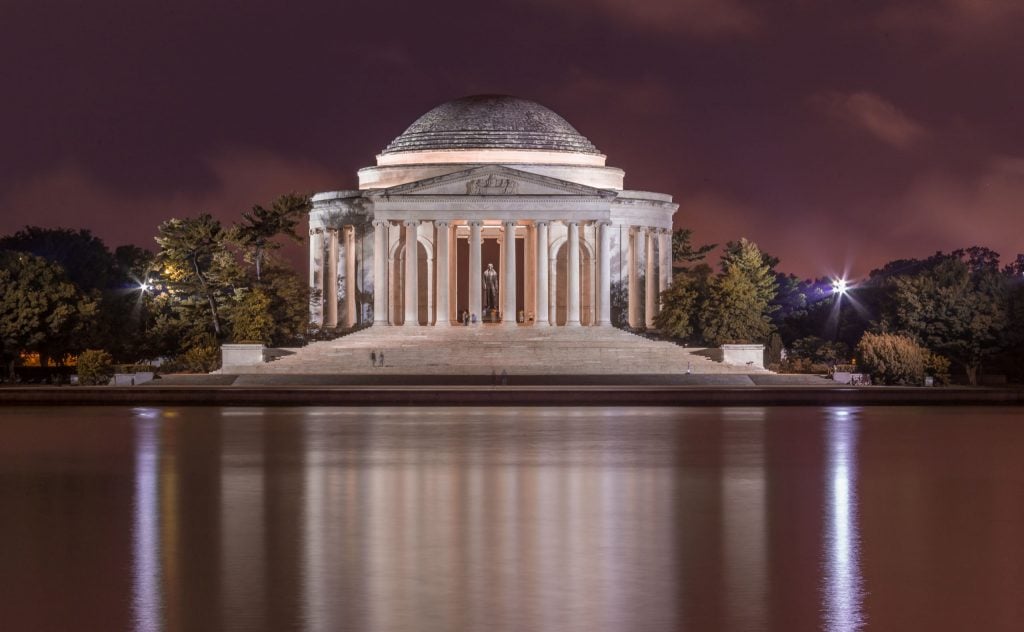
The best spot to photograph the Jefferson Memorial is across the Tidel Basin at the Floral Library waterfront walkway. Walk along the shore until you see the statue of Jefferson inside the memorial and shoot direct from the front with the statue reflecting in the water. It started to pour rain when I arrived so I had just one or two chances to get this night photography shot right. I didn’t want my camera to get soaked. In my opinion, the photo turned out quite nice at 180 mm. There are 2 versions in the gallery below; do you see the difference?
Night photography New York City
New York City is a magnificent city at night. It has an awesome skyline photography spot with the famous Manhattan Bridge connecting Manhattan and Brooklyn in front of it. Times Square is full of light throughout the day but at night it’s one of a kind. I went for night photography twice of which one I went already as sunset to photograph the skyline. I visited New York City as part of my 2 week USA city trip. I’ll show you the best spots for night photography in New York City so you don’t lose precious time finding them.
USA – Best city trip itinerary for 2 weeks: New York, Washington DC, Denver & Las Vegas
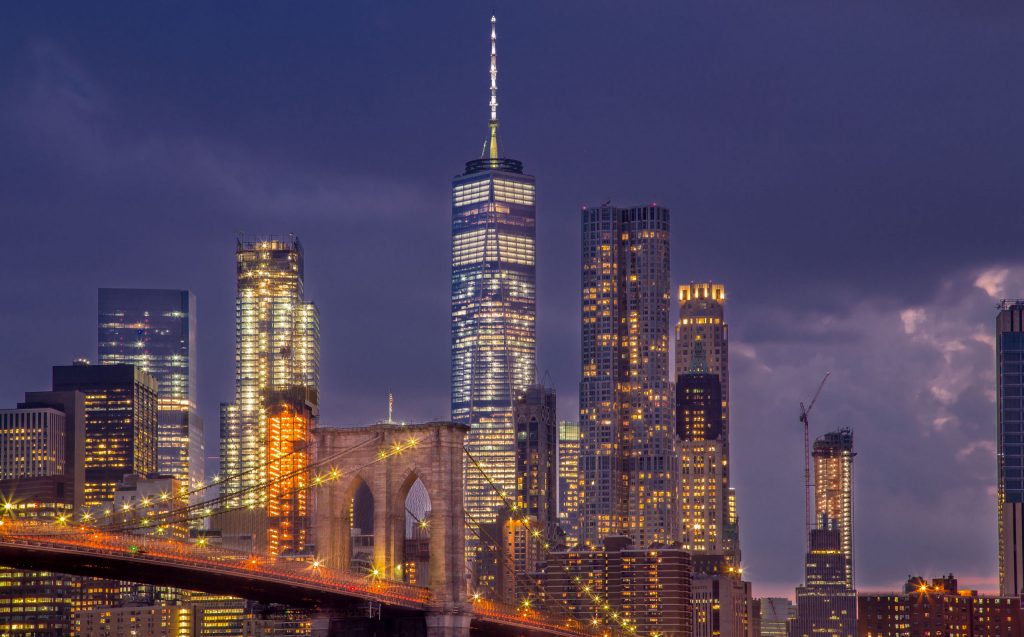
Night photography New York City: Manhattan bridge & skyline
This is probably the most photographed skyline composition of New York City but still worth to go and shoot it yourself! I went at sunset as I wanted to have color in the sky and use my ND filter to get silky water. Take a taxi or Uber to the end of Pearl St. street and walk to the shore of the Hudson river. There is a small area in John Street Park where you can sit to watch the sunset and that’s where you want to be. I had my tripod setup at the lower right side near the water. After I installed my ND10 filter I configured my camera on F22 and ISO100 with an exposure in the B mode. I use the app Photo Buddy to calculate the exposure by first putting the settings without ND filter and then turning the wheel in the app. The exposure was about 50 seconds.
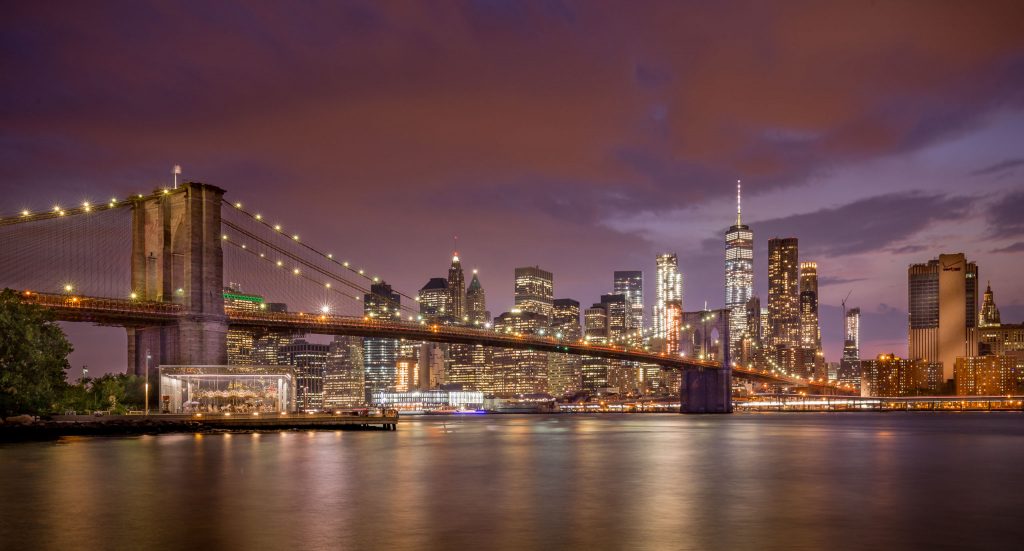
I first shot with a medium wide angle lens some shots to be sure to have a good photo. Then I installed my 28-105 and zoomed it to 105mm and shot two rows of 8 photos for a panorama photo in high resolution. With an exposure of almost a minute it took me almost half an hour to shoot it with two photos of each position. I did that to be sure at east one was sharp but 1 of 16 photos for some reason both where a bit blurry due to vibration. Bad luck but I still had my wide-angle shots as a backup and the result you can see above.
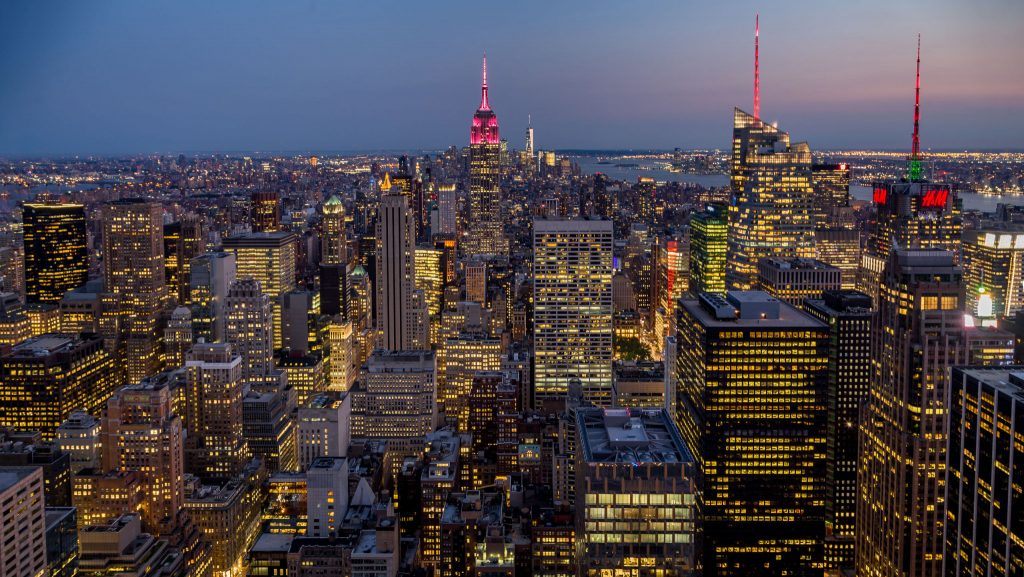
Night photography New York City: Top of the Rocks & Empire State Building
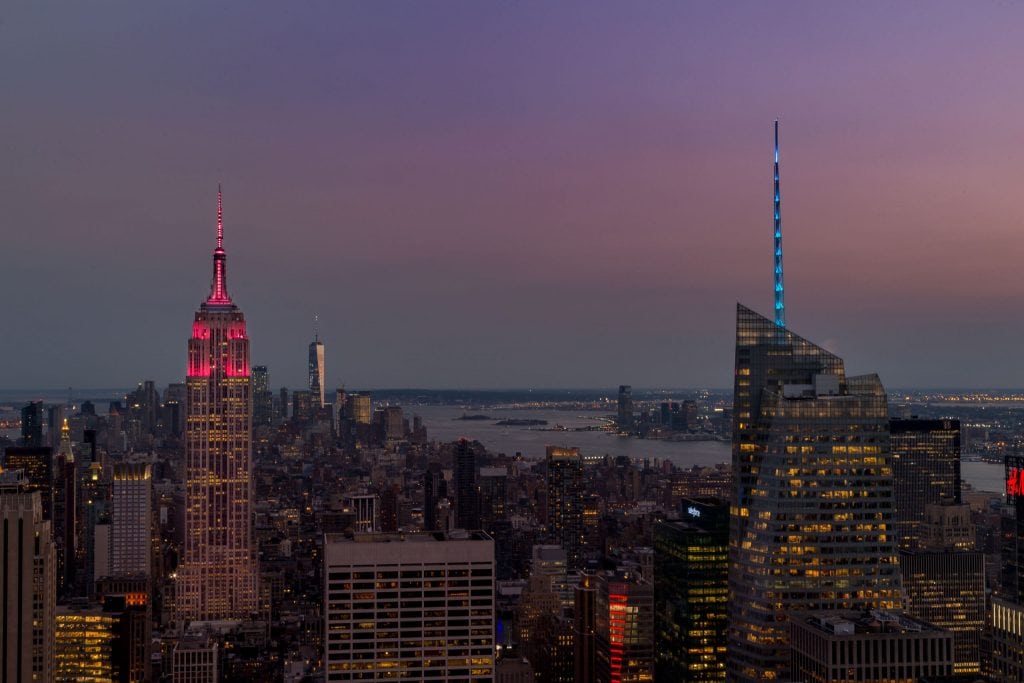
I already shot the skyline of New York City at night from the ground and now I wanted to do this from the top. The best place to do this is at the Top of the Rocks as from there you can see the Empire State Building. It’s also outside so you’re not behind glass which will cause reflections. Make sure to arrive well before sunset to get a spot to put your camera on the wall as no tripods are allowed and you can’t shoot by hand at night. I used again F22 to have a full depth of field (all skyscrapers are in focus) and shot at various times during sunset. I did put my ISO in this case to about 2500-4000 as I didn’t have a tripod but was holding the camera on a wall. The best photo below!
Night photography New York City: Times Square
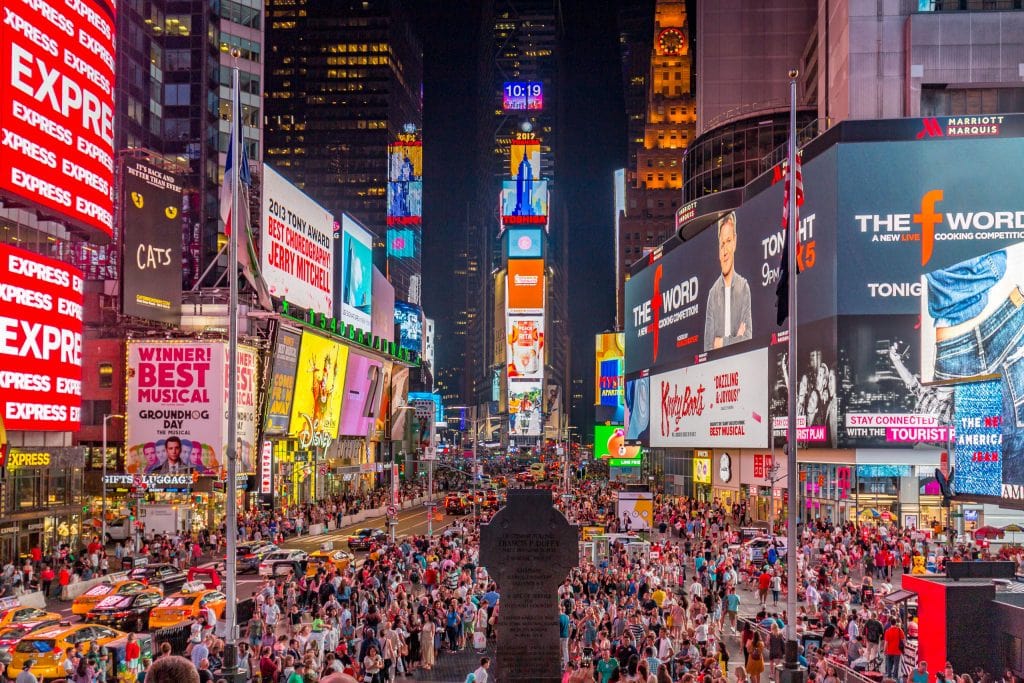
Remember in the tips and tricks section that I told you about an ND filter? To get movement in the photo on Times Square this is needed as there is so much light the exposure is short. So, why is there no movement in the photo below? That’s because my ND filter was still in my hotel room and I had no time to get it as I had a flight later that night. I still wanted to shoot a night photo at Times Square for this night photography guide so I used a short shutter speed. I hope to return to New York City one day and experiment more with night photography on Times Square.
I hope these tips and tricks for night photography help you perfect your night photos. The places mentioned are in my opinion the best places to shoot at night but maybe you know about other places? I look forward to hearing from you if you do. Be sure to read my basic photo editing tips for Photoshop if you want to know how I edited these photos. I visited New York City and Washington DC on a 2 week USA city trip a while ago. Read that post to find out where to shoot the Las Vegas skyline at night! It’s awesome.
Stay tuned for more stories and subscribe to the newsletter or follow CTB on social media (Facebook, Twitter, Instagram including Instagram stories; on all social media you can find CTB @christravelblog) to get updated information.
Did you visit Washington or New York too or do you have questions? Please leave a comment at the bottom of the page. Love to hear from you!
Further reading
Sometimes it’s impossible to cover every single place of interest, activities, food, and others that might be relevant. In the below list you find a list of relevant links with further information about Washington or New York which I have carefully curated. These will help plan your trip even better.
- Did you know that Washington DC is famous for cherry blossoms? They were gifted back in 1912 by the Japanese. The best time to photograph is from March to April. Check the folowing article to learn all about the Washington DC cherry blossoms.
Gallery night photography New York City & Washington DC
Click an image for a full screen gallery of more photos taken during this trip. If you like to use any photo for commercial, private or editorial use please contact first for permission and/or pricing.


